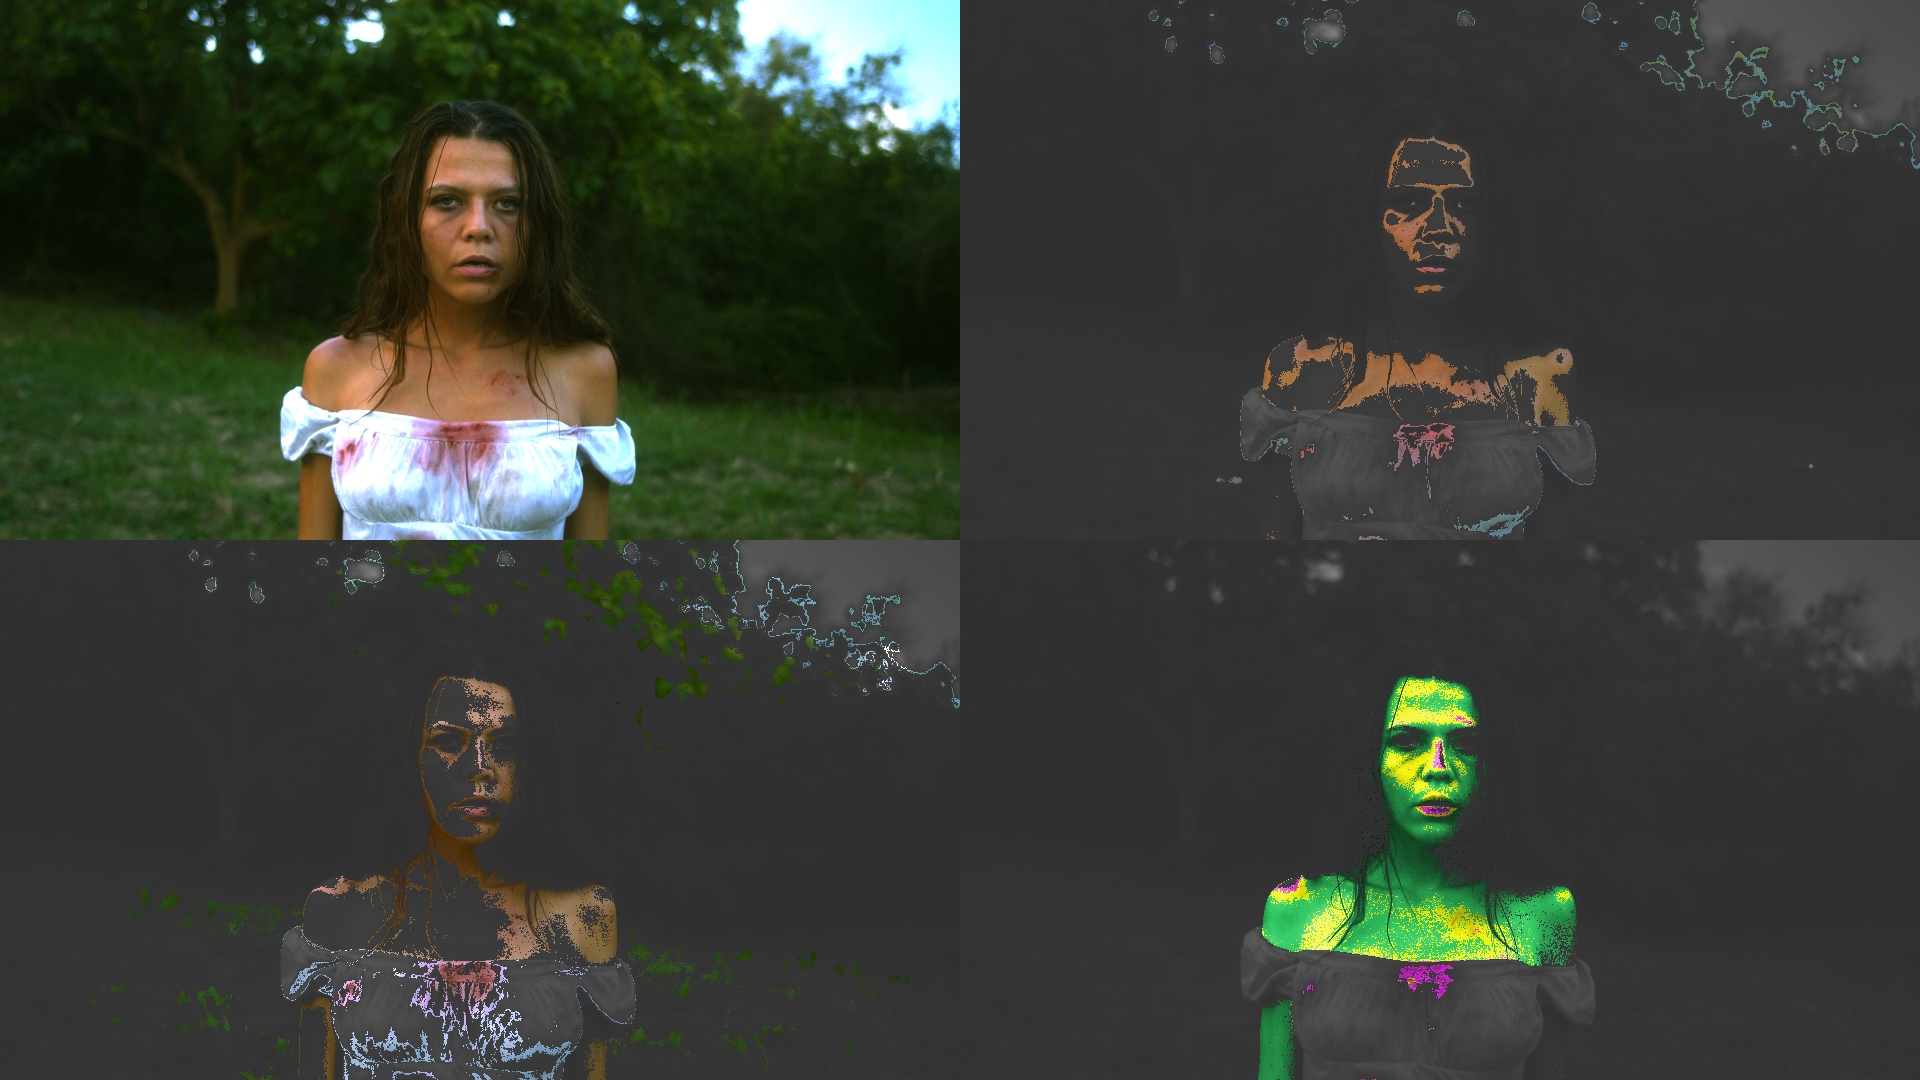
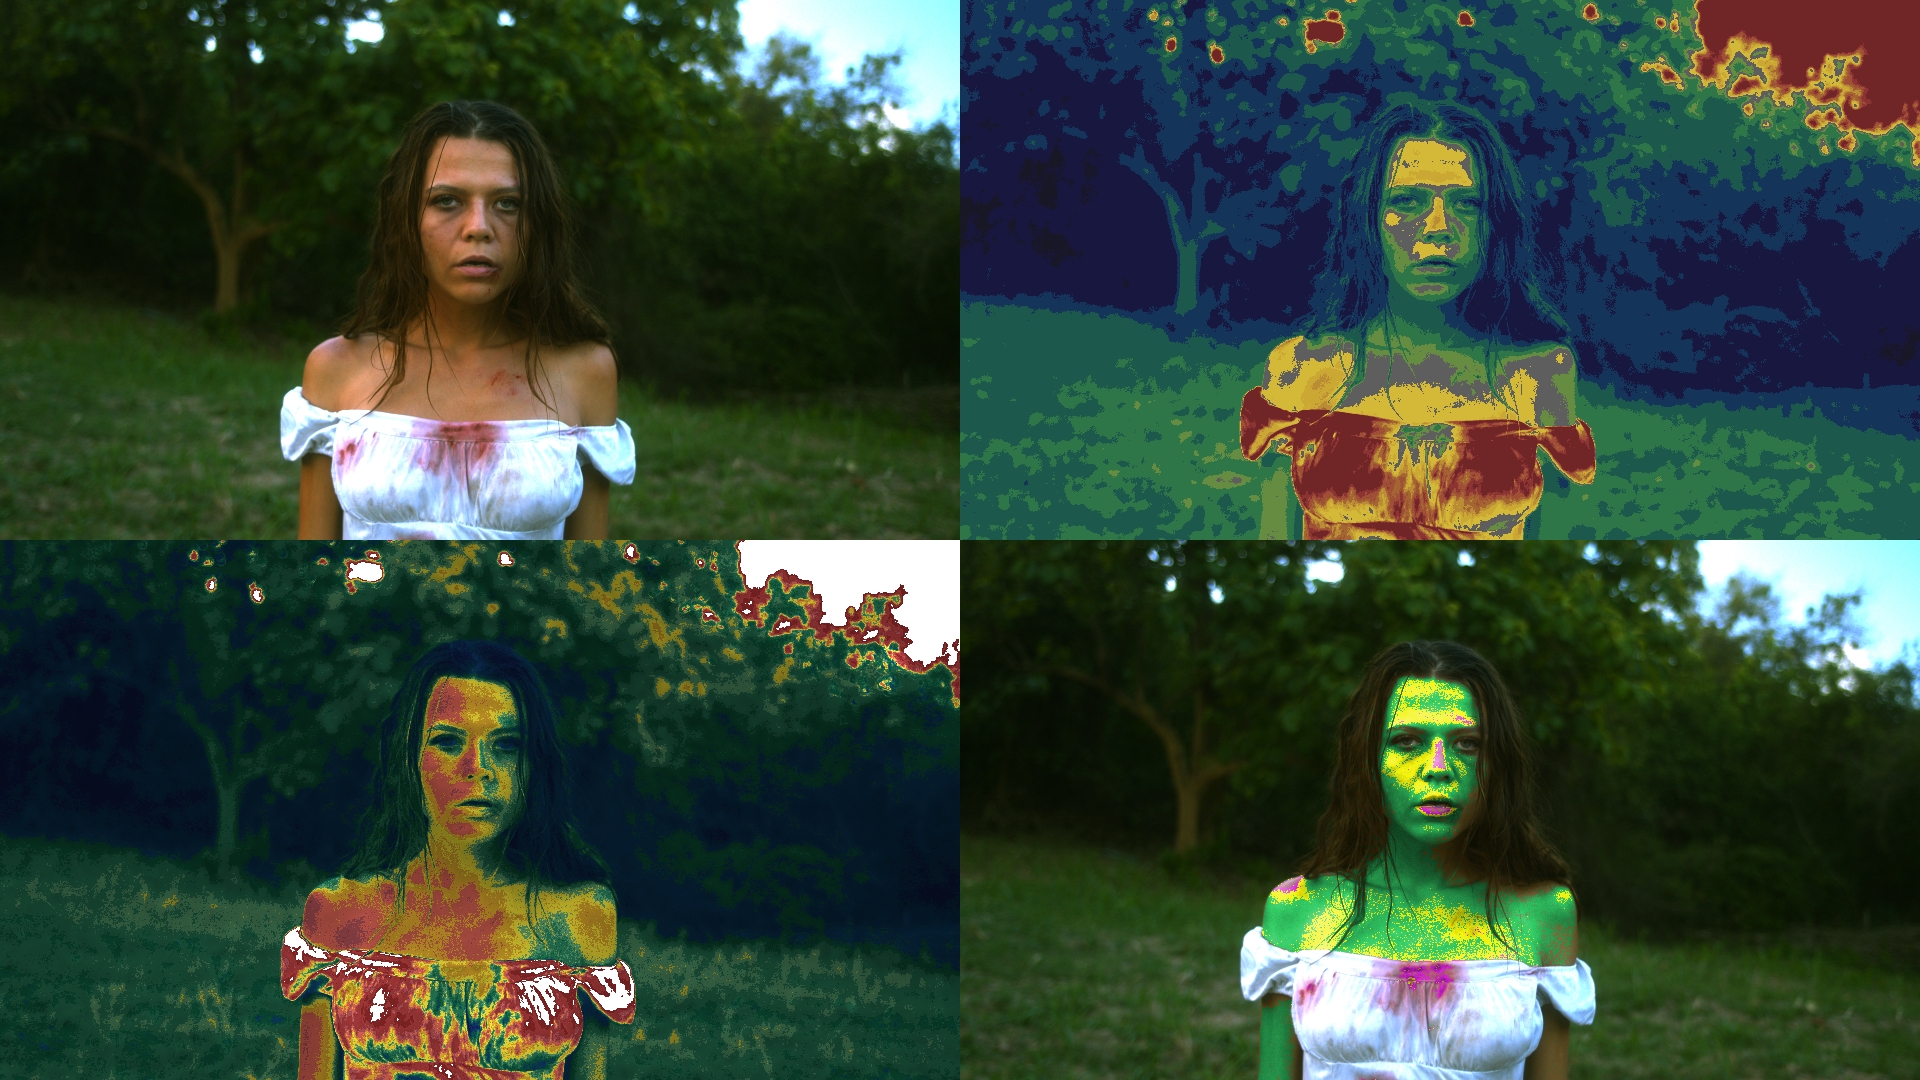
Four-way skin & tone diagnostic · DCTL · DaVinci Resolve

See the skin
before you
qualify it.

Skin Tone Mastery splits one frame into four live views: source, exposure, saturation and hue. It's calibrated for skin out of the box and pivots to any hue you want to inspect, so you can read a tone the moment you drop it on a node, no guesswork in the qualifier.

4views, one frame
7hue vectors
18.7°skin-calibrated
Tool output Real export
Skin Tone Mastery four-quadrant output Source Exposure Saturation Hue
All Four

Real exports from the tool on a single skin-tone frame. The hue vector here is set to Skin (18.7°).

Why it exists

Stop guessing in the qualifier.

Qualifying a skin tone in Resolve's built-in qualifier is iterative tweaking with no way to see the whole picture. You pick at the hue, then the saturation, then the luminance, one at a time, and you never see how the three relate on the same frame.

Skin Tone Mastery puts all three diagnostics plus the raw source in one frame. Hue, saturation and exposure, side by side, updating together. You read the tone, then go qualify it knowing exactly where it sits.

The usual way vs. one frame
Qualifier alone
  • One channel at a time
  • No view of hue, sat and exposure together
  • Tweak, check a scope, tweak again
  • Easy to miss skin that has gone neutral
Skin Tone Mastery
  • Four views of the same frame at once
  • Hue, saturation and exposure read together
  • Drop it on a node and read it instantly
  • Neutral skin flagged in bright green

One frame · four lenses

Four views of the same frame.

Every panel analyses the same image through a different lens, so you can isolate, qualify and evaluate a tone without leaving the node. Set the Primary View dropdown to any single panel to blow it up to the full frame.

The four panels: source, exposure heatmap, saturation heatmap and hue indicator 01 Source 02 Exposure 03 Saturation 04 Hue Indicator
Top-left · 01

Source

The unprocessed input, for reference.

Your frame, untouched, so you always have ground truth next to the analysis. In Monochrome mode it shows luminance only, which is handy when you want to read exposure without color pulling your eye.

Read it for

A constant reference point. Everything in the other three panels is this same frame, seen differently.

Top-right · 02

Exposure heatmap

False color by luminance zone.

A false-color ramp maps dark blues through greens into yellows and oranges, up to clipped reds. The Target Exposure slider shifts where the neutral grey band sits, so you can park it on the tone you care about. Gray Non-Selected shows only pixels within ±0.05 luminance of the target in their true source color and greys the rest.

Read it for

Where your skin sits on the exposure scale, and whether it is landing where you want it before you touch a wheel.

Bottom-left · 03

Saturation heatmap

False color by perceptual saturation.

A false-color ramp maps low saturation (blue) through mid (green and yellow) up to high (orange and red), using HSV saturation times value so it tracks what you actually perceive. Target Saturation sets the neutral band, and Gray Non-Selected isolates only the pixels inside the target saturation window.

Read it for

Overcooked or flat skin at a glance, and whether your saturation is even across the face.

Bottom-right · 04

Hue indicator

The primary selection display.

Pixels inside the Matched Hue Range are painted yellow. Pixels in the Indicator Range but on the green side of target go green; the magenta side goes magenta. Everything outside both ranges passes through unchanged, or greys out if Gray Non-Selected is on. Highlight Neutral paints near-neutral pixels bright green so you can catch skin that has desaturated to grey.

Read it for

Exactly which way your skin is leaning, green or magenta, off the target hue, and how wide the spread is across the frame.

Diagnostic modes

Switch how the frame reads.

A handful of toggles change what survives to screen, so you can go from a broad overview to a single isolated cluster ready to feed Resolve's scopes.

Gray Non-Selected mode: only the qualifying pixels keep their true color Gray Non-Selected
Gray Non-Selected

Only the pixels that qualify.

In the exposure and saturation panels, everything outside the target window drops to grey, leaving just the qualifying pixels in true color. The hue indicator does the same around your selection. It is the fastest way to confirm exactly which pixels fall inside your window before you commit to a key.

Exposure: ±0.05 window Saturation: target window Hue: matched range
Vectorscope Mode: all four panels grey down to just the selected hue cluster Vectorscope Mode
Vectorscope Mode

Feed the cluster straight to your scopes.

All four quadrants grey down based on the hue selection, so only the selected hue cluster passes through. Point this node at Resolve's vectorscope or parade and you can confirm where your skin cluster actually sits, without leaving the grade or building a separate key.

Isolates the selected hue Built to drive internal scopes

Every control

Dial it in.

The defaults land on skin, so most shots need nothing but a glance. When you want to push further, here is the whole panel.

Dropdown

Hue Vector

Starts on skin, switches to inspect any vector you want: Skin, Red, Yellow, Green, Cyan, Blue or Magenta.

default · Skin (18.7°)
Slider

Matched Hue Range

Width of the primary yellow selection zone. Scaled to one skin-tone step, so the slider is perceptually calibrated for skin work.

unit · 18.7° steps
Slider

Indicator Range

Width of the green and magenta deviation bands that sit just outside the core selection.

green / magenta bands
Slider

Target Angle Adj

Fine-tune the hue centre up to ±60° from the selected vector without changing the dropdown.

range · ±60°
Slider

Target Exposure

Sets the centre of the exposure window for the exposure heatmap panel.

neutral grey band
Slider

Target Saturation

Sets the centre of the saturation window for the saturation heatmap panel.

neutral sat band
Dropdown

Primary View

All Four by default, or collapse to Hue Indicator, Saturation or Exposure to fill the frame with one panel.

All Four / single panel
Toggle

Gray Non-Selected

Greys everything outside the target window in the exposure and saturation panels, leaving only qualifying pixels in true color.

off by default
Toggle

Vectorscope Mode

Greys all four quadrants by the hue selection so only the chosen cluster passes to Resolve's scopes.

scope feed
Toggle

Highlight Neutral

Paints near-neutral grey pixels bright green in the hue indicator, flagging skin that has desaturated.

neutral catcher
Toggle

Monochrome

Converts all panels to luminance for exposure-focused analysis without color in the way.

luma only
Tip

Close-up exposure

Set Primary View to a single panel for precise exposure targeting on tight shots, where one full-resolution diagnostic beats four small ones.

workflow

The premium tools

Get Skin Tone Mastery, and everything else.

Skin Tone Mastery comes with the whole Tool Box. Become a Happy Little Noder and unlock every premium tool on the channel, plus every update and new release. One low annual fee that will never be raised, so lock it in once and you're set.

Plenty is free, forever

A whole set of the Tool Box is free, always. Grab the Tool Box Manager and start playing today, then unlock the premium kit whenever you're ready.

Happy Little Noders
$47.34/ year

Everything you see on YouTube, plus every update, for one annual fee that's never been raised.

  • Skin Tone Mastery, all four panels and every mode
  • Every premium DCTL & OFX plugin in the Tool Box
  • All future tools & updates included
  • Photo Chemist, Technicolor DRT, Color Slicer & more
  • Price locked, never raised
Get the premium tools →
One annual payment · price locked

Getting started

Install in a couple of clicks.

The Tool Box Manager installs Skin Tone Mastery, keeps it organized, and updates it for you alongside the rest of the kit. Works on macOS, Windows and Linux, no manual file-copying required.

Open the Tool Box Manager

Grab the latest release from GitHub and open it. It's your home base for every Dec. 18 tool.

Find Skin Tone Mastery in the list

Browse the catalog inside the Manager and select Skin Tone Mastery, right alongside the rest of the kit.

Click Install

The Manager drops the DCTL into the right place for you, no digging through system folders.

Restart DaVinci Resolve

Relaunch Resolve so it picks up the new DCTL.

Apply it on a diagnostic node

Add a node, apply Skin Tone Mastery as a DCTL, and read the frame. It's a diagnostic, so bypass or remove the node before you render.